Knowledge Base
Before you begin this tutorial, sign up for Issue Overflow. This guide will help you set up so you can start tracking issues.
Step 1: Join an Organization
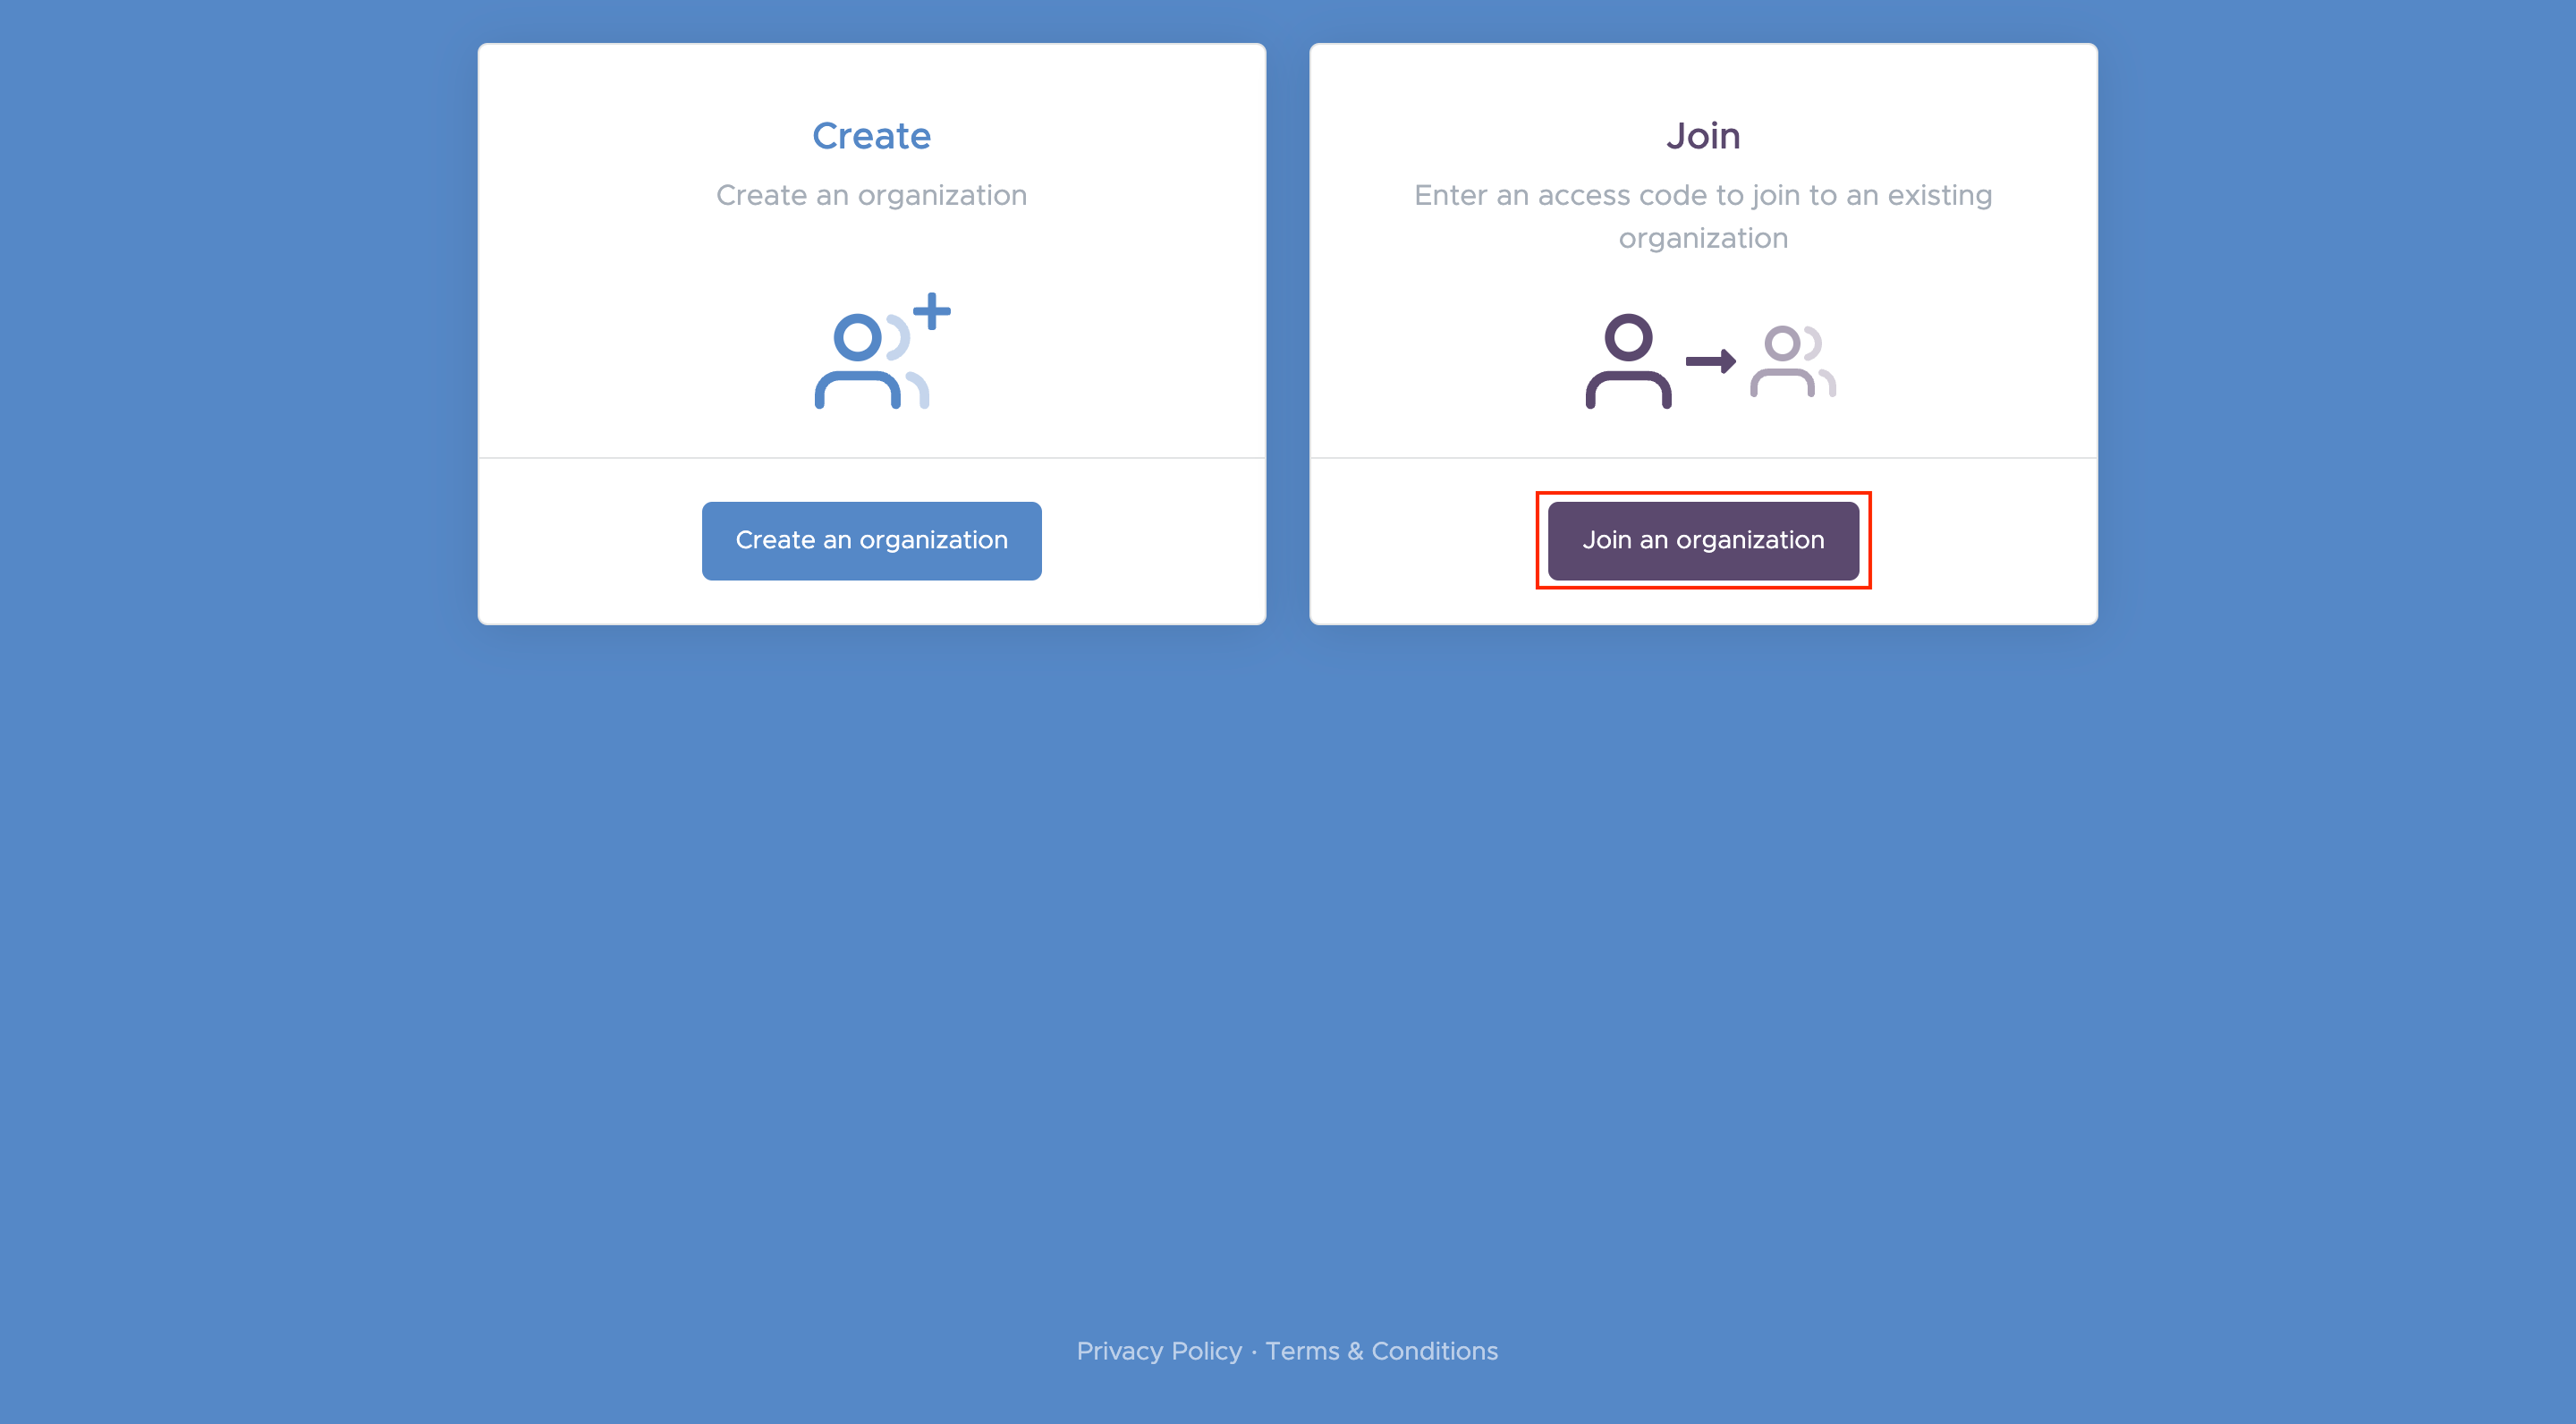
Upon registering, you will be redirected to a page where you make a choice of creating or joining an Organization.
For the purpose of this tutorial, select Join an organization.
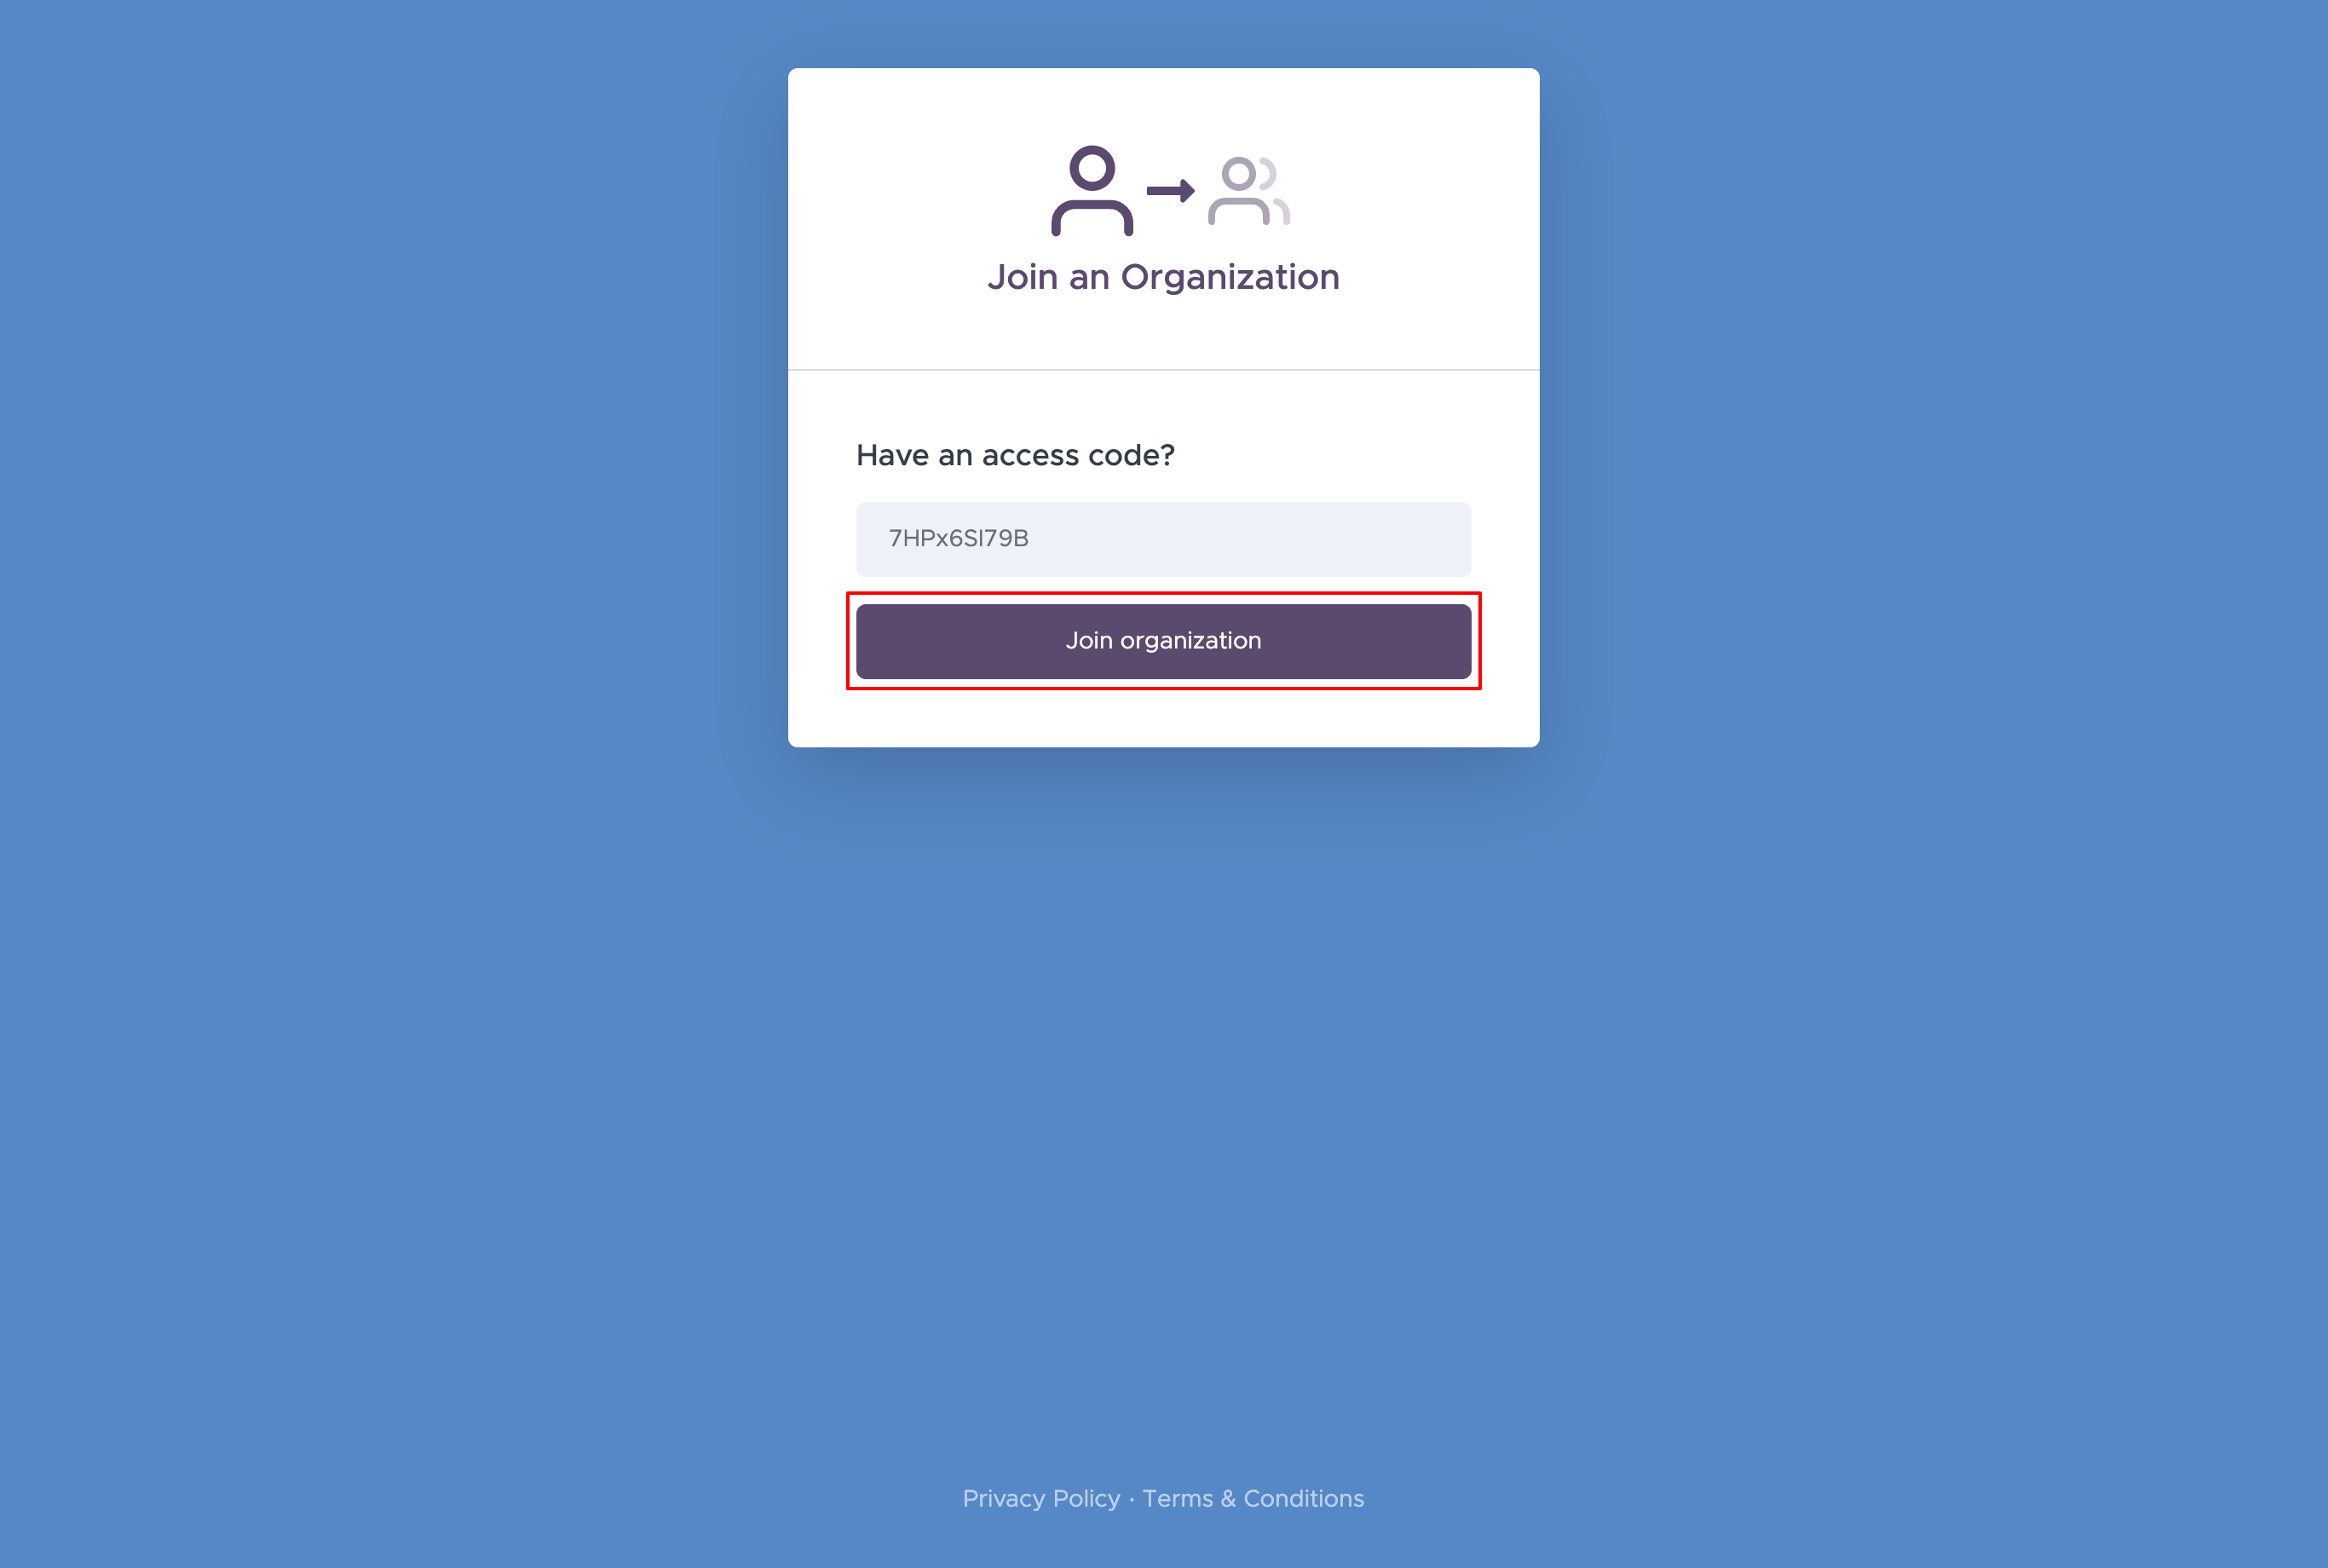
Enter the Access Key that has been shared with you, then select Join organization.
Step 2: Create an Issue
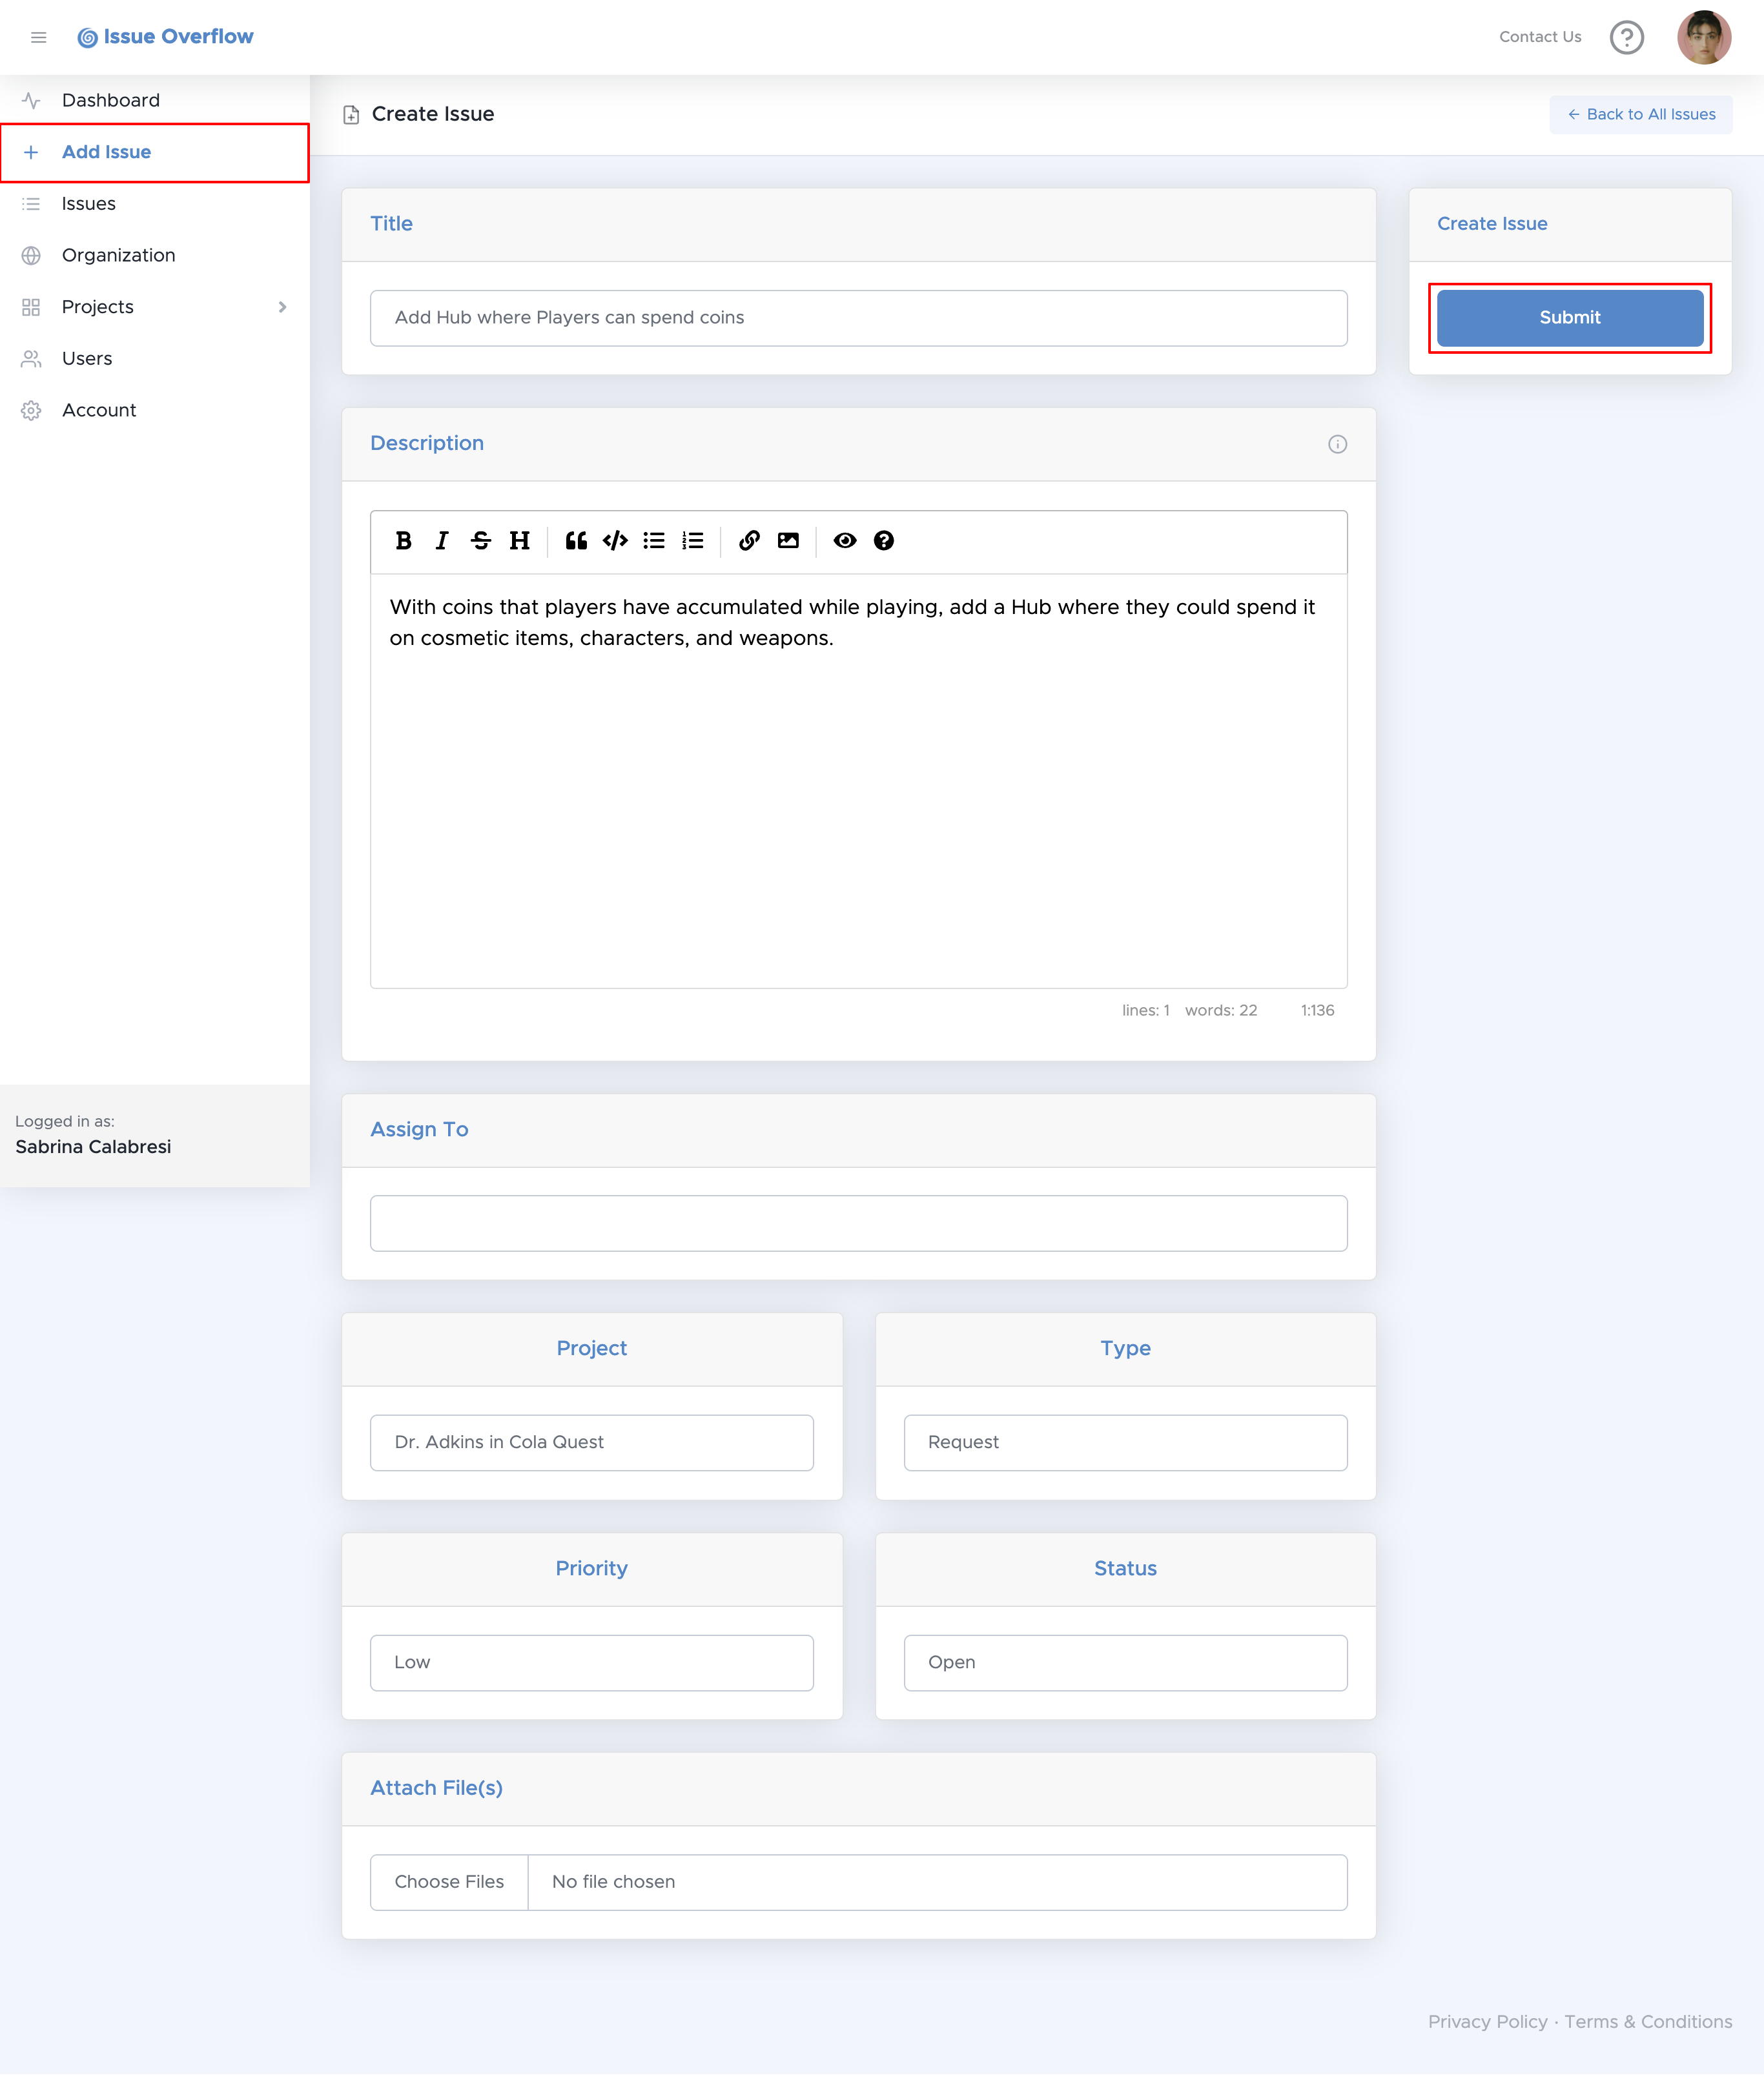
After you have been assigned the appropriate role and added to a project, select Add Issue on the left navigation menu.
You will be redirected to a form where you will enter your desired Issue fields. To learn more about these fields, click here.
After you have filled your desired Issue fields, select Submit on the top right.
Upon creating an Issue, you will be redirected to the newly created Issue's full details page, as shown below.
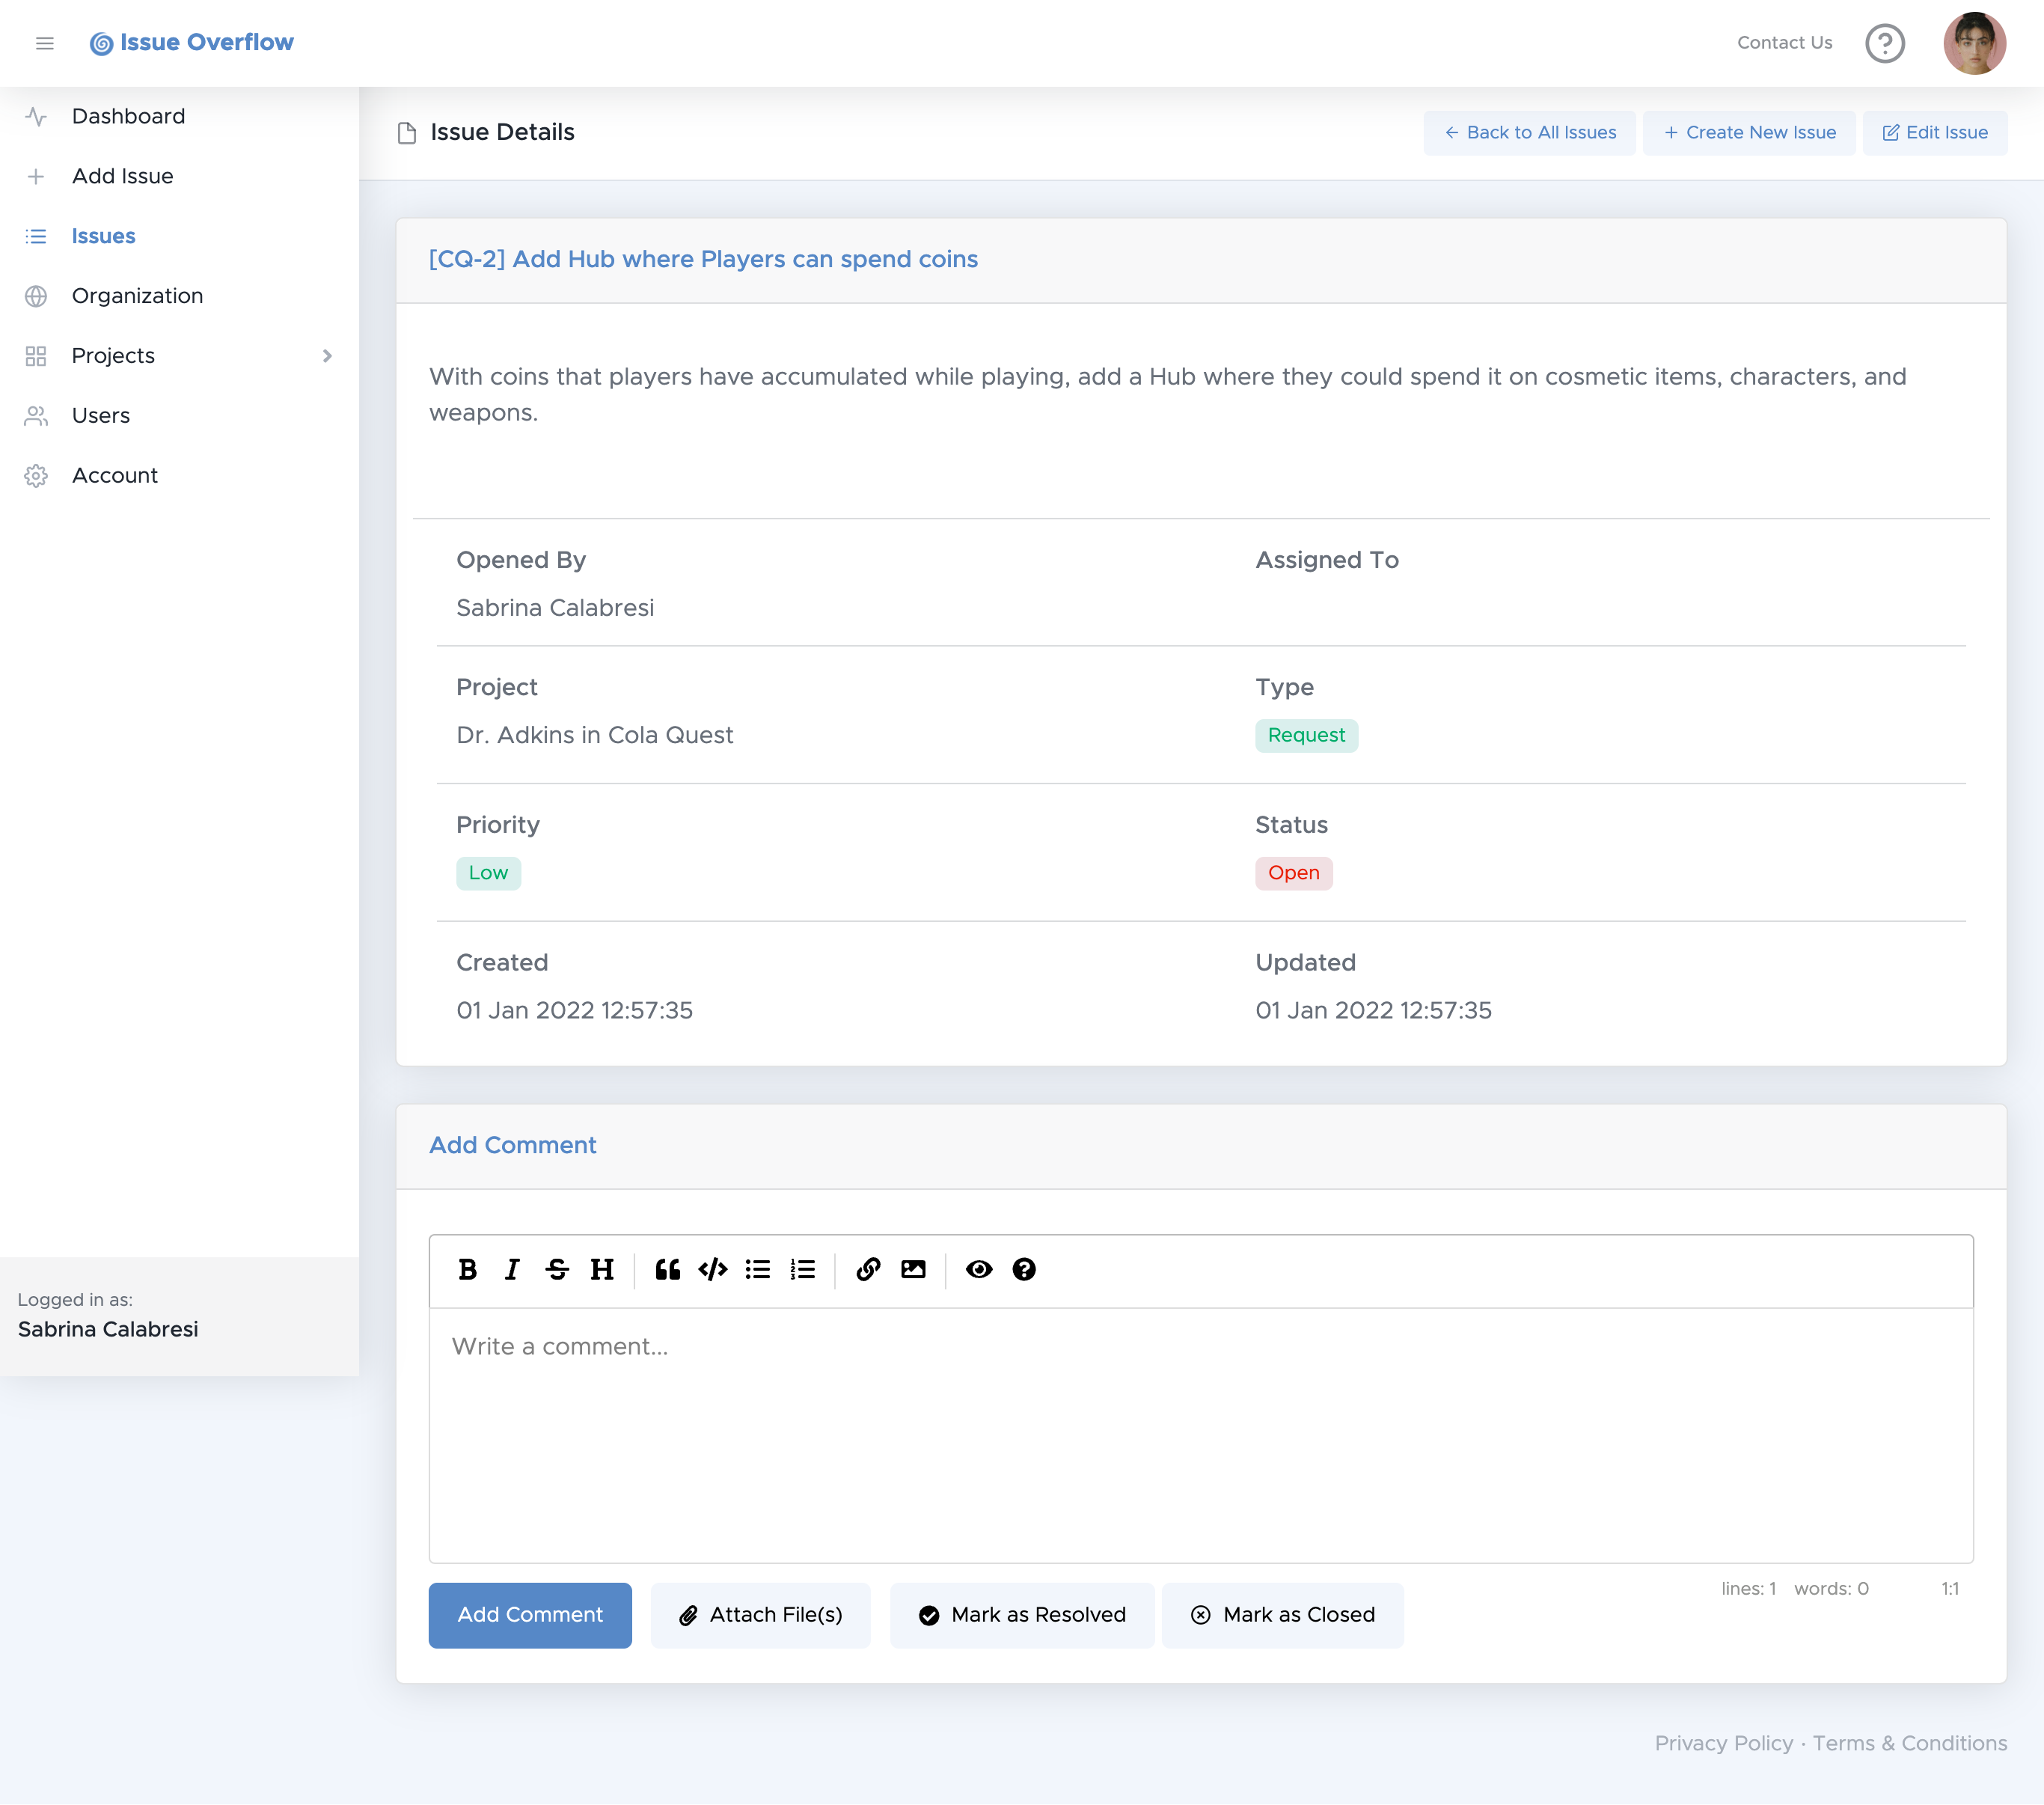
Here, you and other members of the Project can add comments and attach necessary files.
Congratulations! You have successfully began your journey of tracking issues on Issue Overflow!
Step 3: Collaboration
Now that you are connected with your team, you are ready to collaborate and start tracking Issues together.
Good luck to you and your Development Team and don't let those Issues "Overflow"!